I've been working through the WipEout XL models for NullG, starting with Feisar and then applying the same process to Qirex, Auricom, AG Systems and Piranha. All five have now been recreated in Blender, with inset cockpit glass, detailed engine housings, moving control surfaces and worn paint and graphics.
The smaller models have had a pass too: missiles, rockets, mines, the recovery drone, starting lights and track cameras. I've been directing the assistant through the Blender work, using the original geometry and textures as references and checking the results in the engine.
Starting with Feisar
Feisar was the test for the process. The original XL model supplied the proportions, wing profiles, cockpit position, engine openings and texture placement. Front, rear, side, top and underside views made it possible to compare the rebuilt model against those references.
The new surfaces were built in Blender. Bevels give the edges some definition, the engines have recessed throats, and the panels and fairings have thickness. Those details need to hold up close, but the whole ship still needs to look like Feisar when it's moving away from the camera.
I split the reviews into stages: shape first, then cockpit and engine details, paint and wear, moving parts, and finally the native rendering. This kept the feedback specific. A windshield corner could need a smaller radius, an emblem a cleaner outline, or a control surface a thinner profile, without reopening the entire model each time.
Connecting Blender
Blender's community MCP integration lets the assistant inspect and edit the scene, then review the viewport. I use a dedicated Blender session with a saved revision to work from. Scripted recipes sit alongside that interactive access, making construction, material setup, export and comparison captures repeatable.
The editable work stays in a .blend file. The engine receives a self-contained GLB containing the meshes, materials, textures and named parts. That export is then imported into a clean Blender scene for another review, so the pictures show what was actually delivered, including the hierarchy, glass and embedded textures. Each revision has a number and recorded hash, so the comparison pictures can be traced back to the right model.
That means I can ask for a small correction and compare it from the same angle on the next pass.
Cockpits
The cockpit work came down to getting the glass, seals and recesses to agree on the shape of the opening. They now come from the same canopy outline, with a set frame margin and inset depth. Neighboring panes use shared alignment points, so changing one window doesn’t leave its surrounding parts out of place.
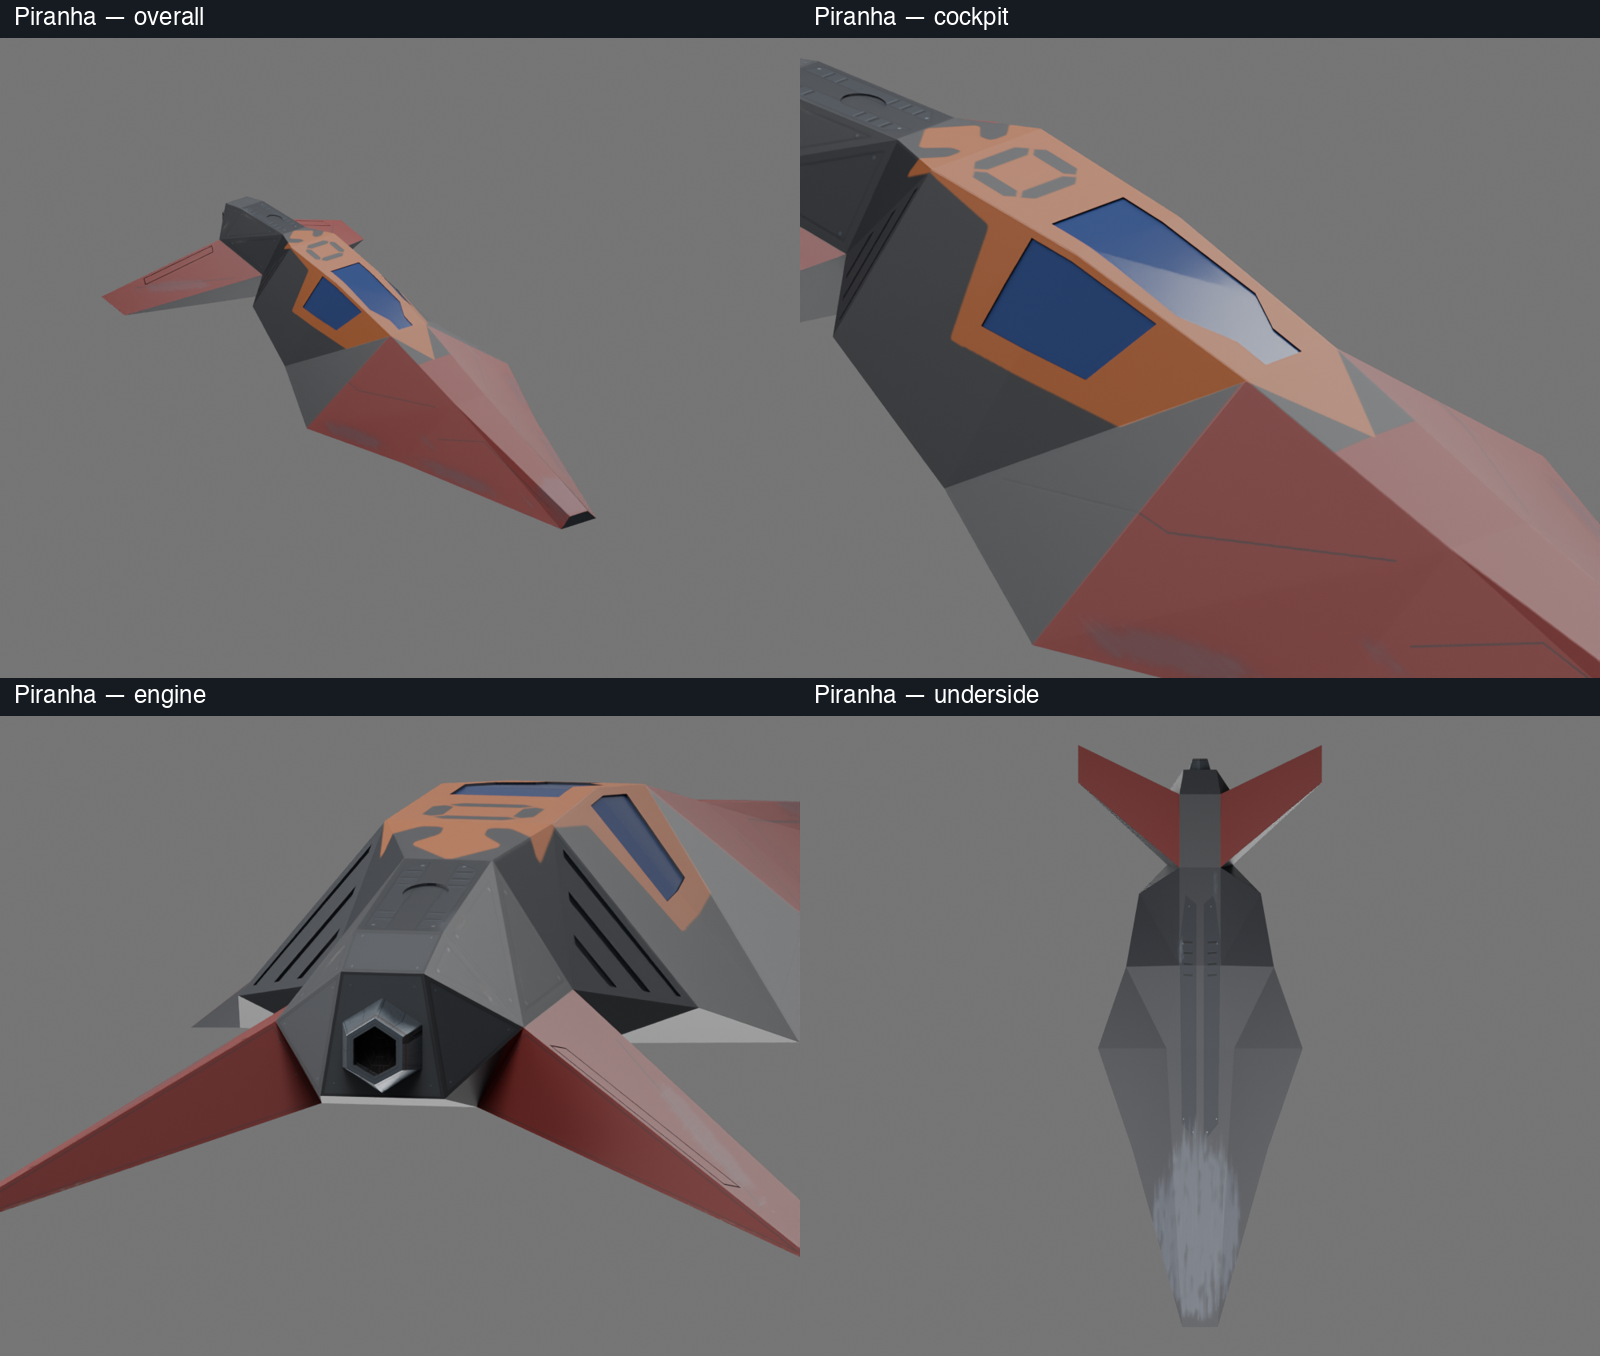
Feisar has separate panes following its angular canopy. Auricom has forward glazing and a roof window within the red cockpit section. Piranha's side windows needed a refined profile, with an even orange surround and a flat lower edge. The geometry differs, but the relationships between glass, frame and opening are the same.
The same approach helped with vents following their supporting panels and lens rims meeting their housings. Much of the close-up work was making neighboring pieces actually meet.
The five ships
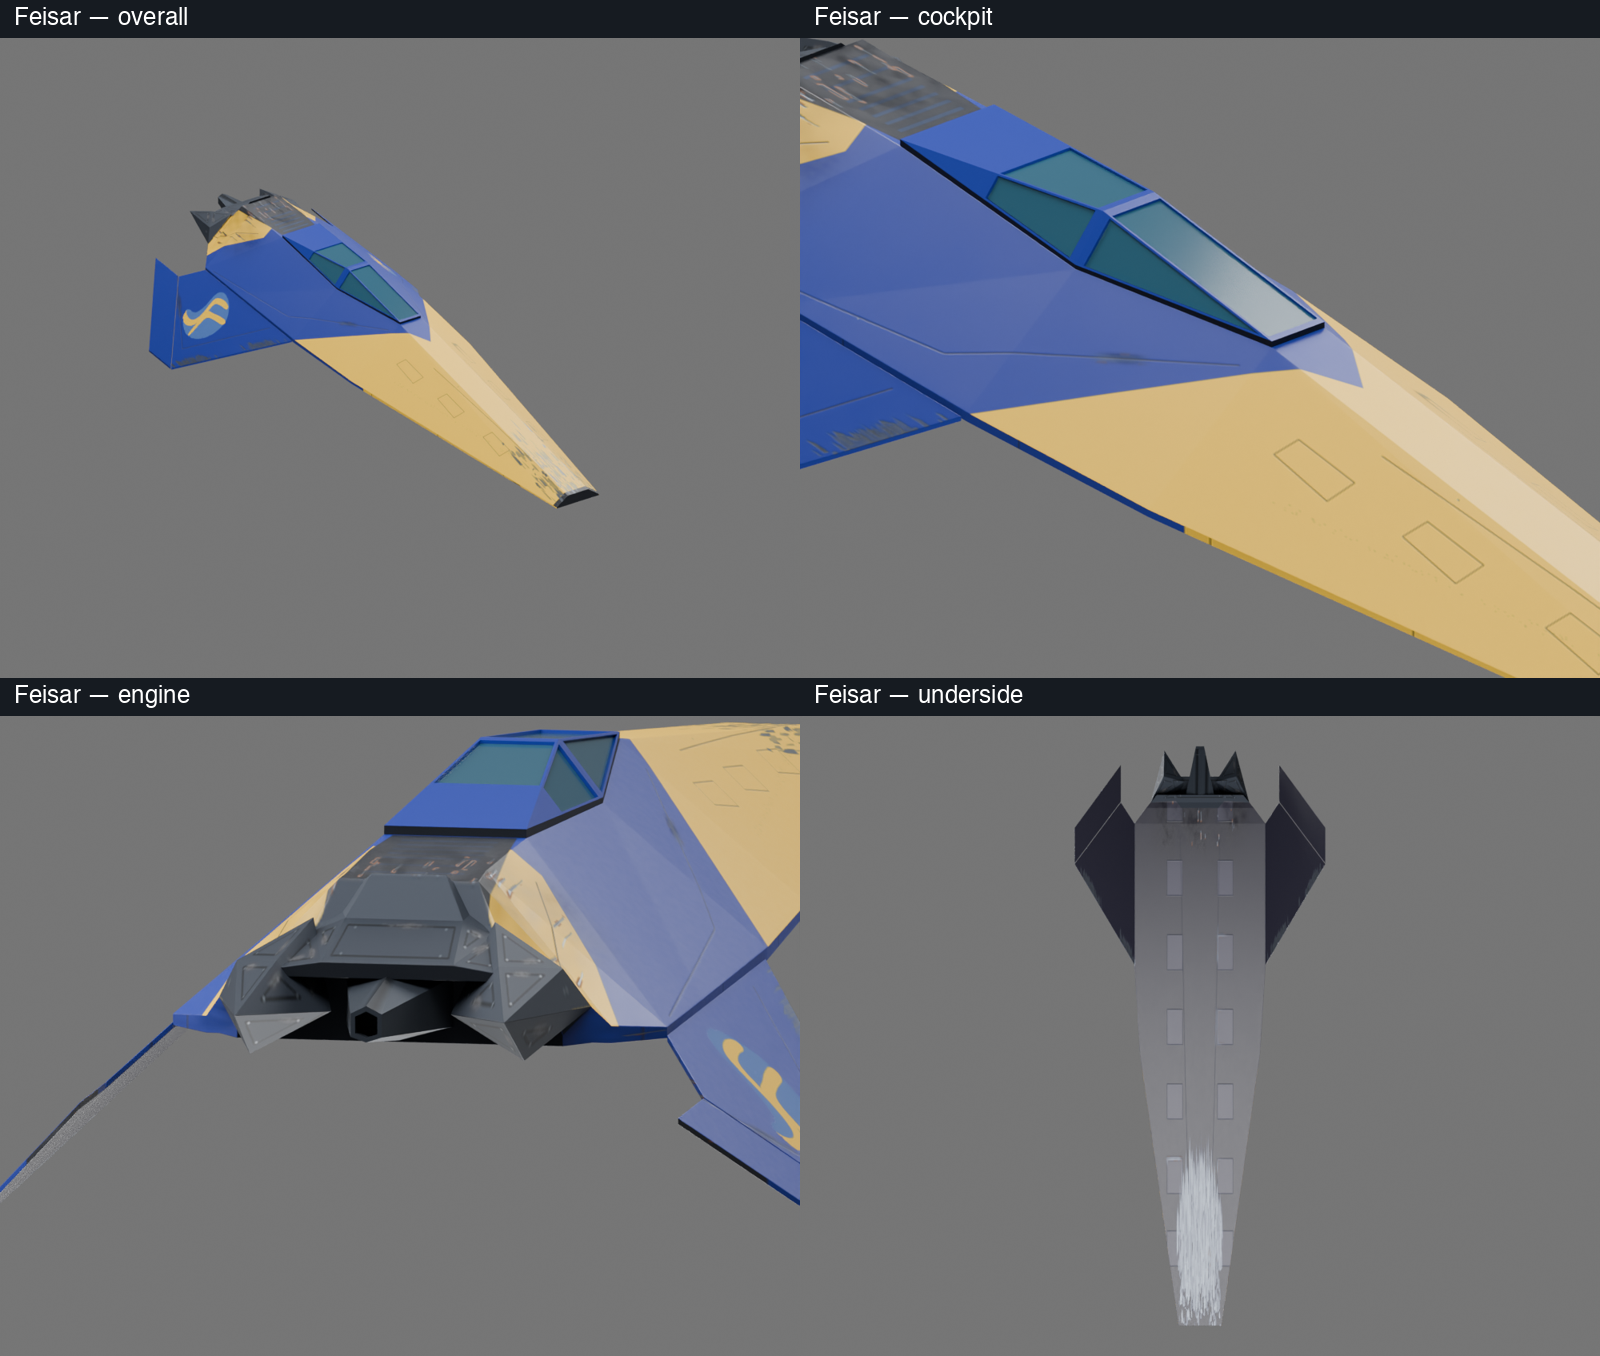
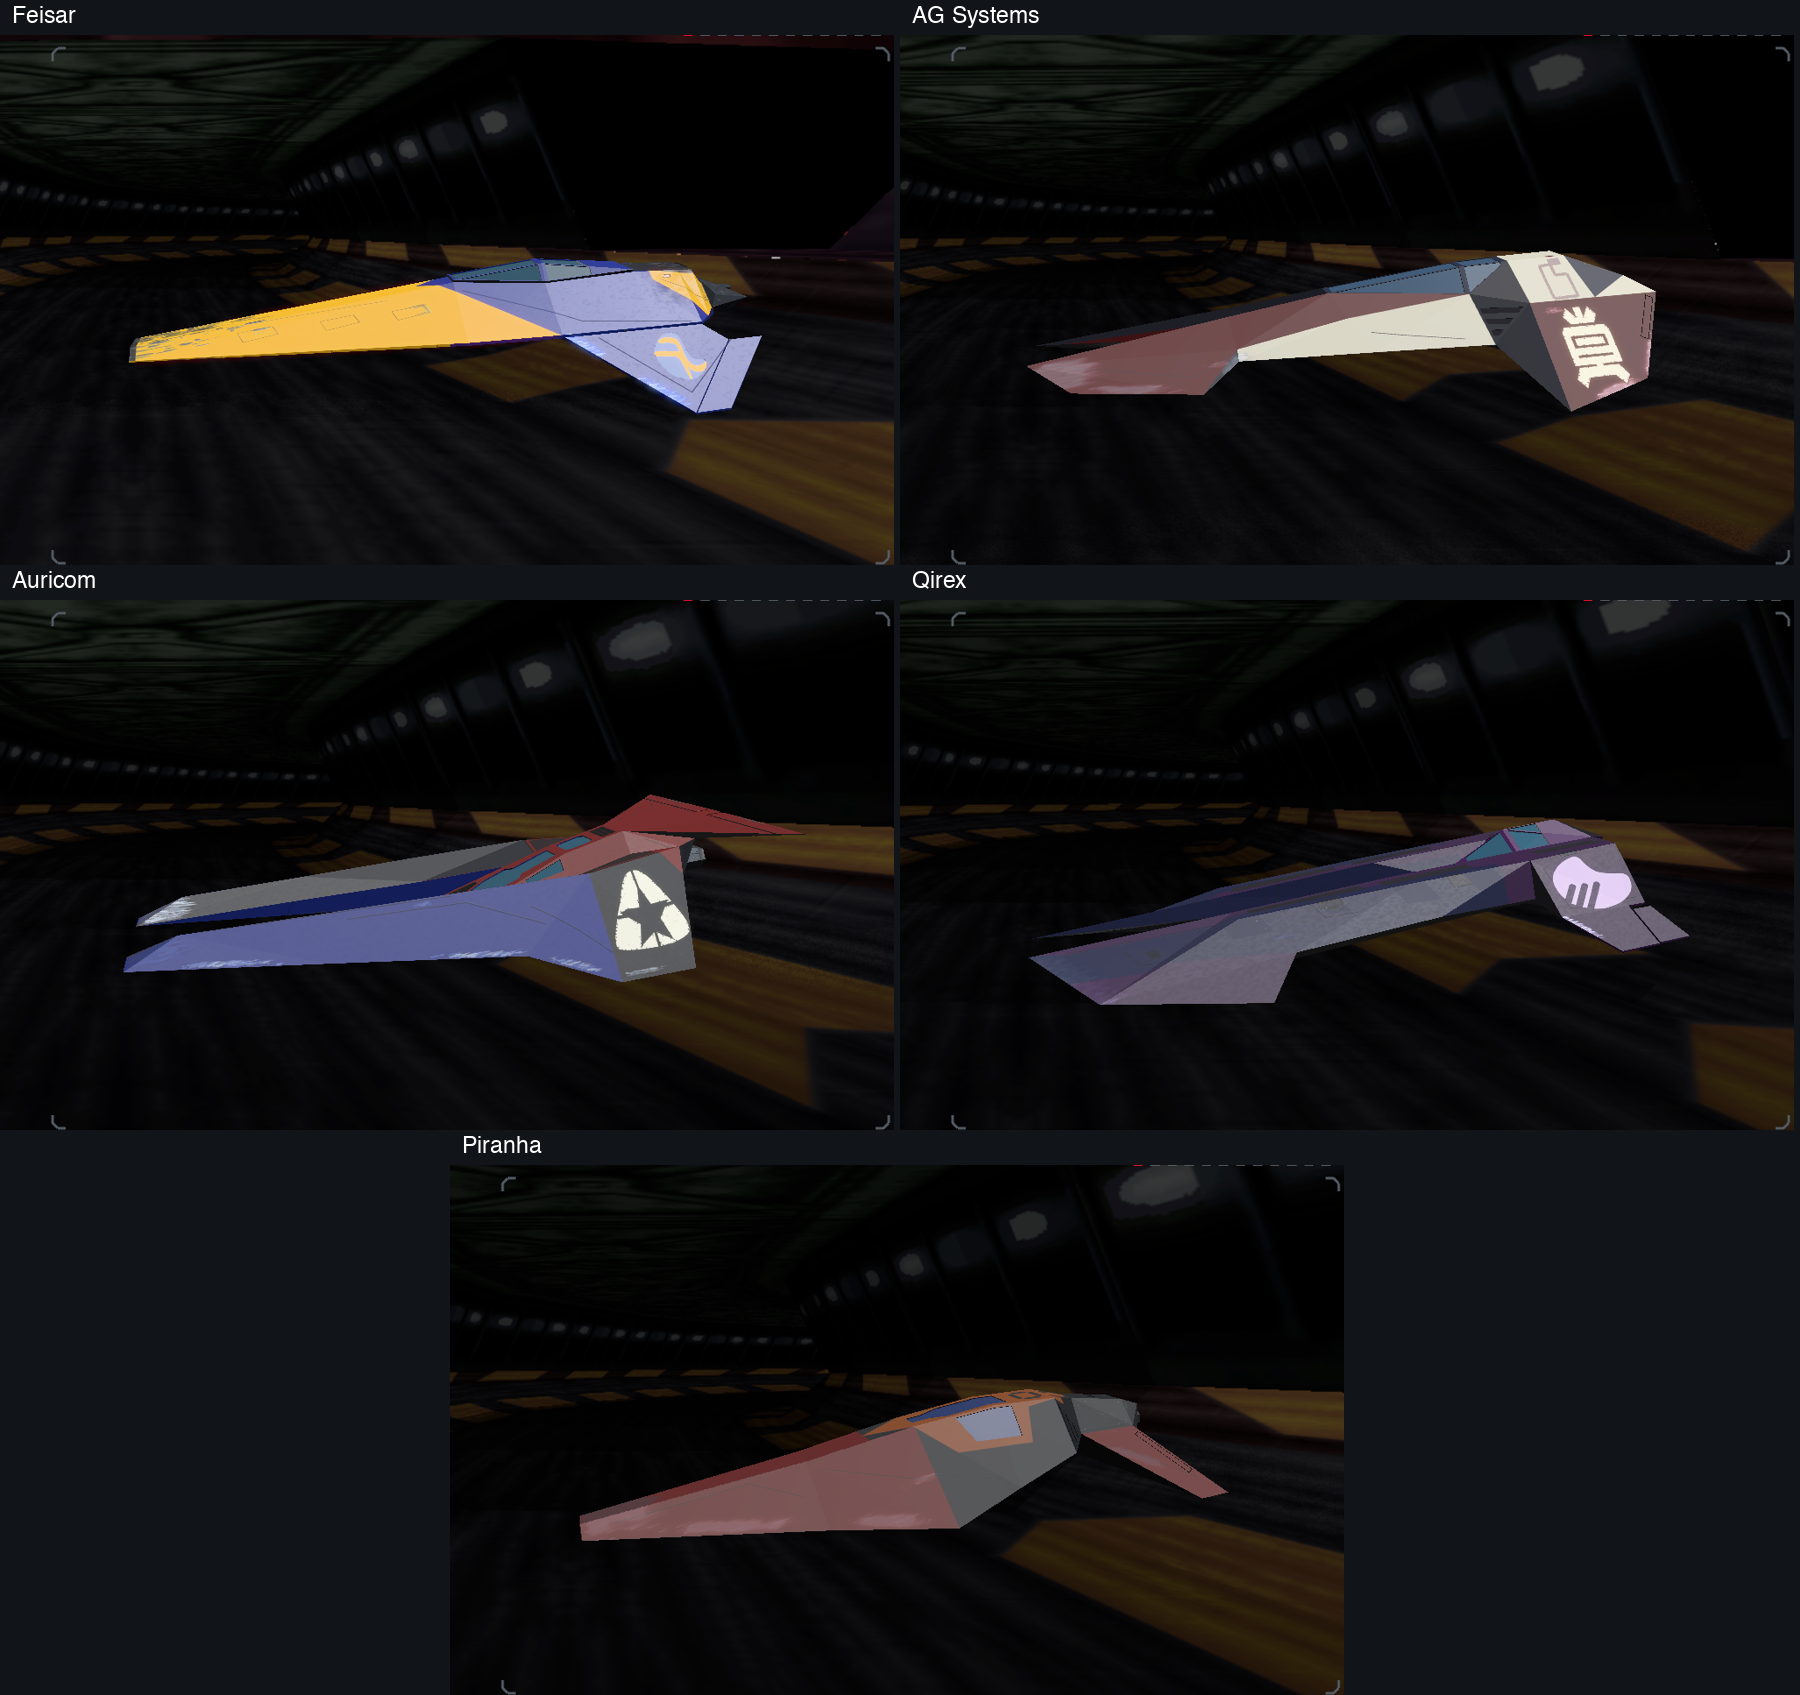
Feisar established the material finish: lightly glossy paint, darker machinery, tinted glass and exposed alloy where the hull is scratched. The yellow nose has more contact wear, while the wings retain their blue color blocks. Its emblem is treated as a vinyl sticker over paint. A broader abrasion patch sits underneath toward the nose, where the hull might brush the road.
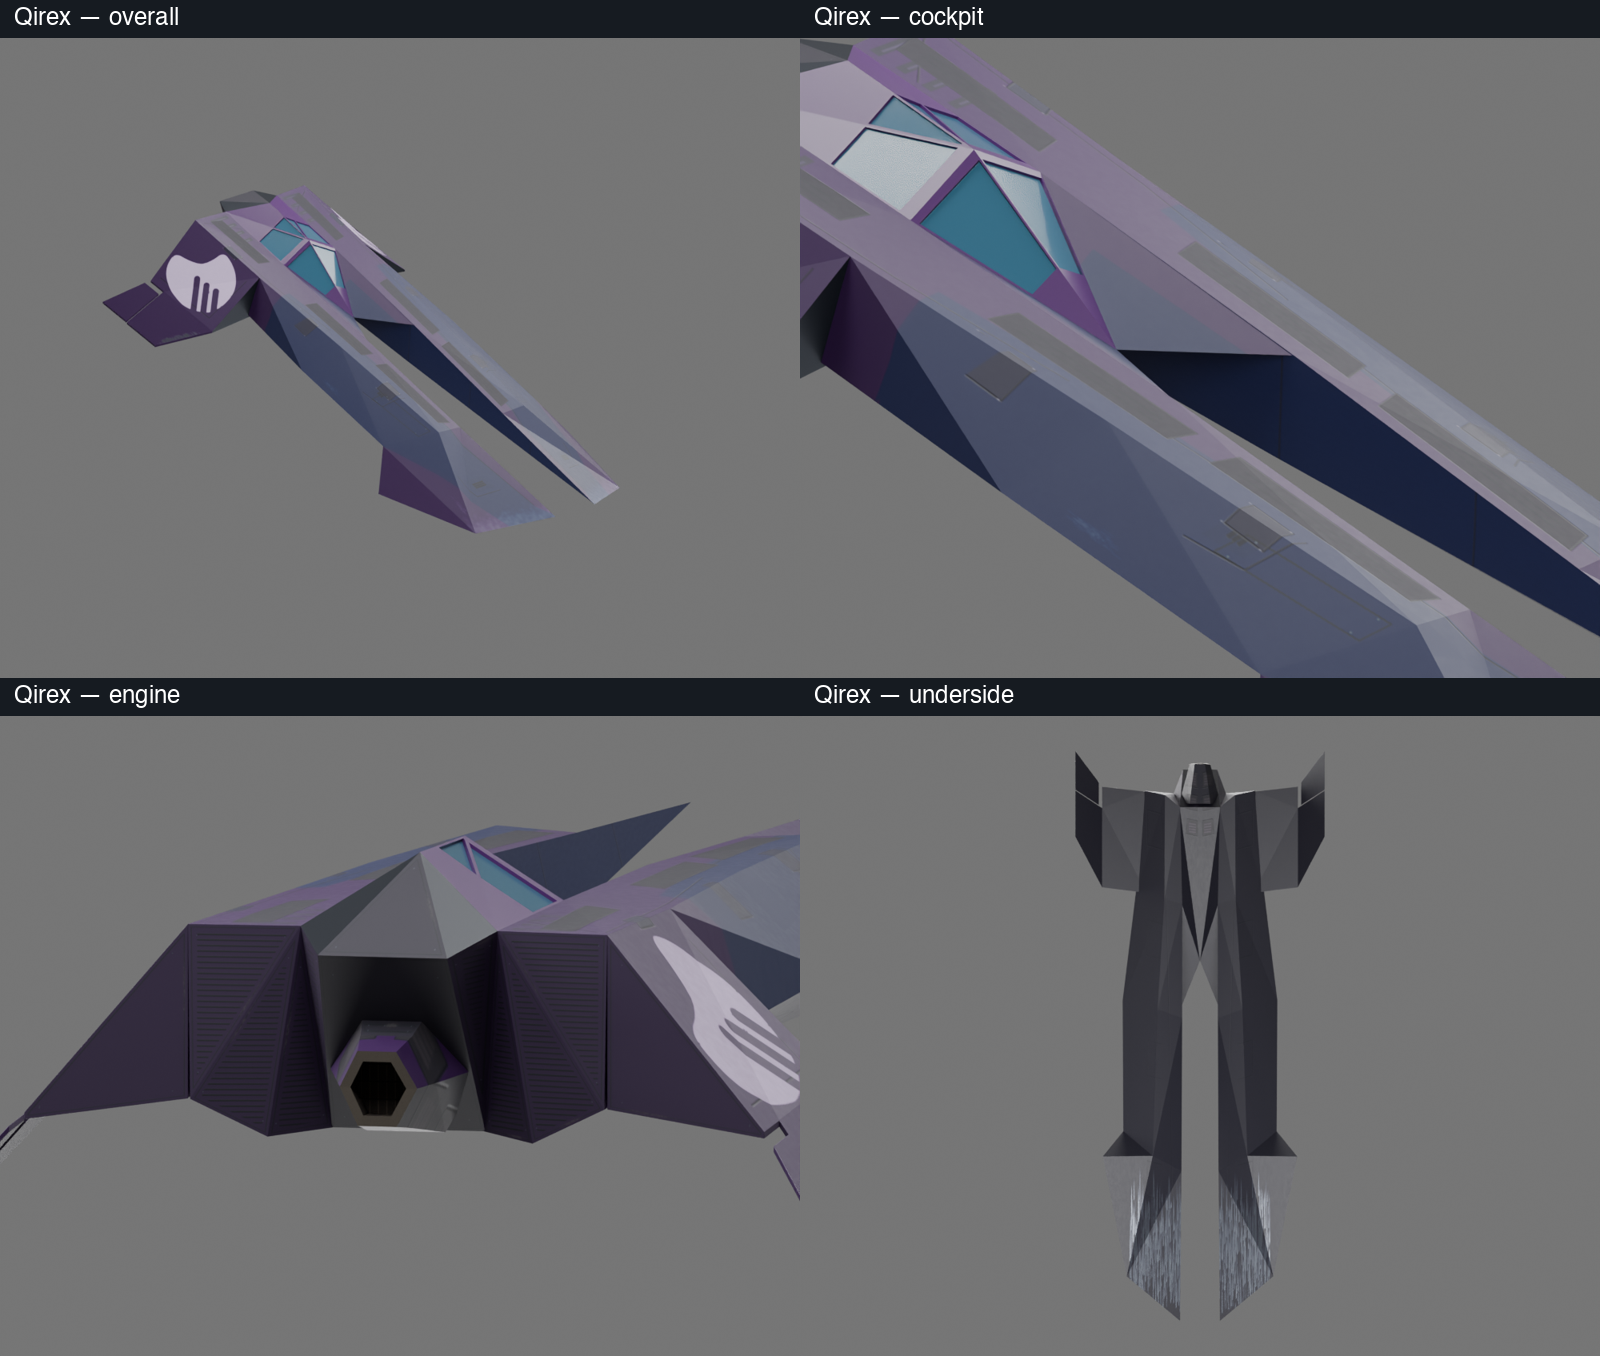
Qirex has a very different shape to work around. The long purple sides frame the cockpit, and the mechanical texture continues across the rear and into the engine. The repeated slots in the emblem use consistent dimensions. Most of the wear sits on the exposed outer surfaces.
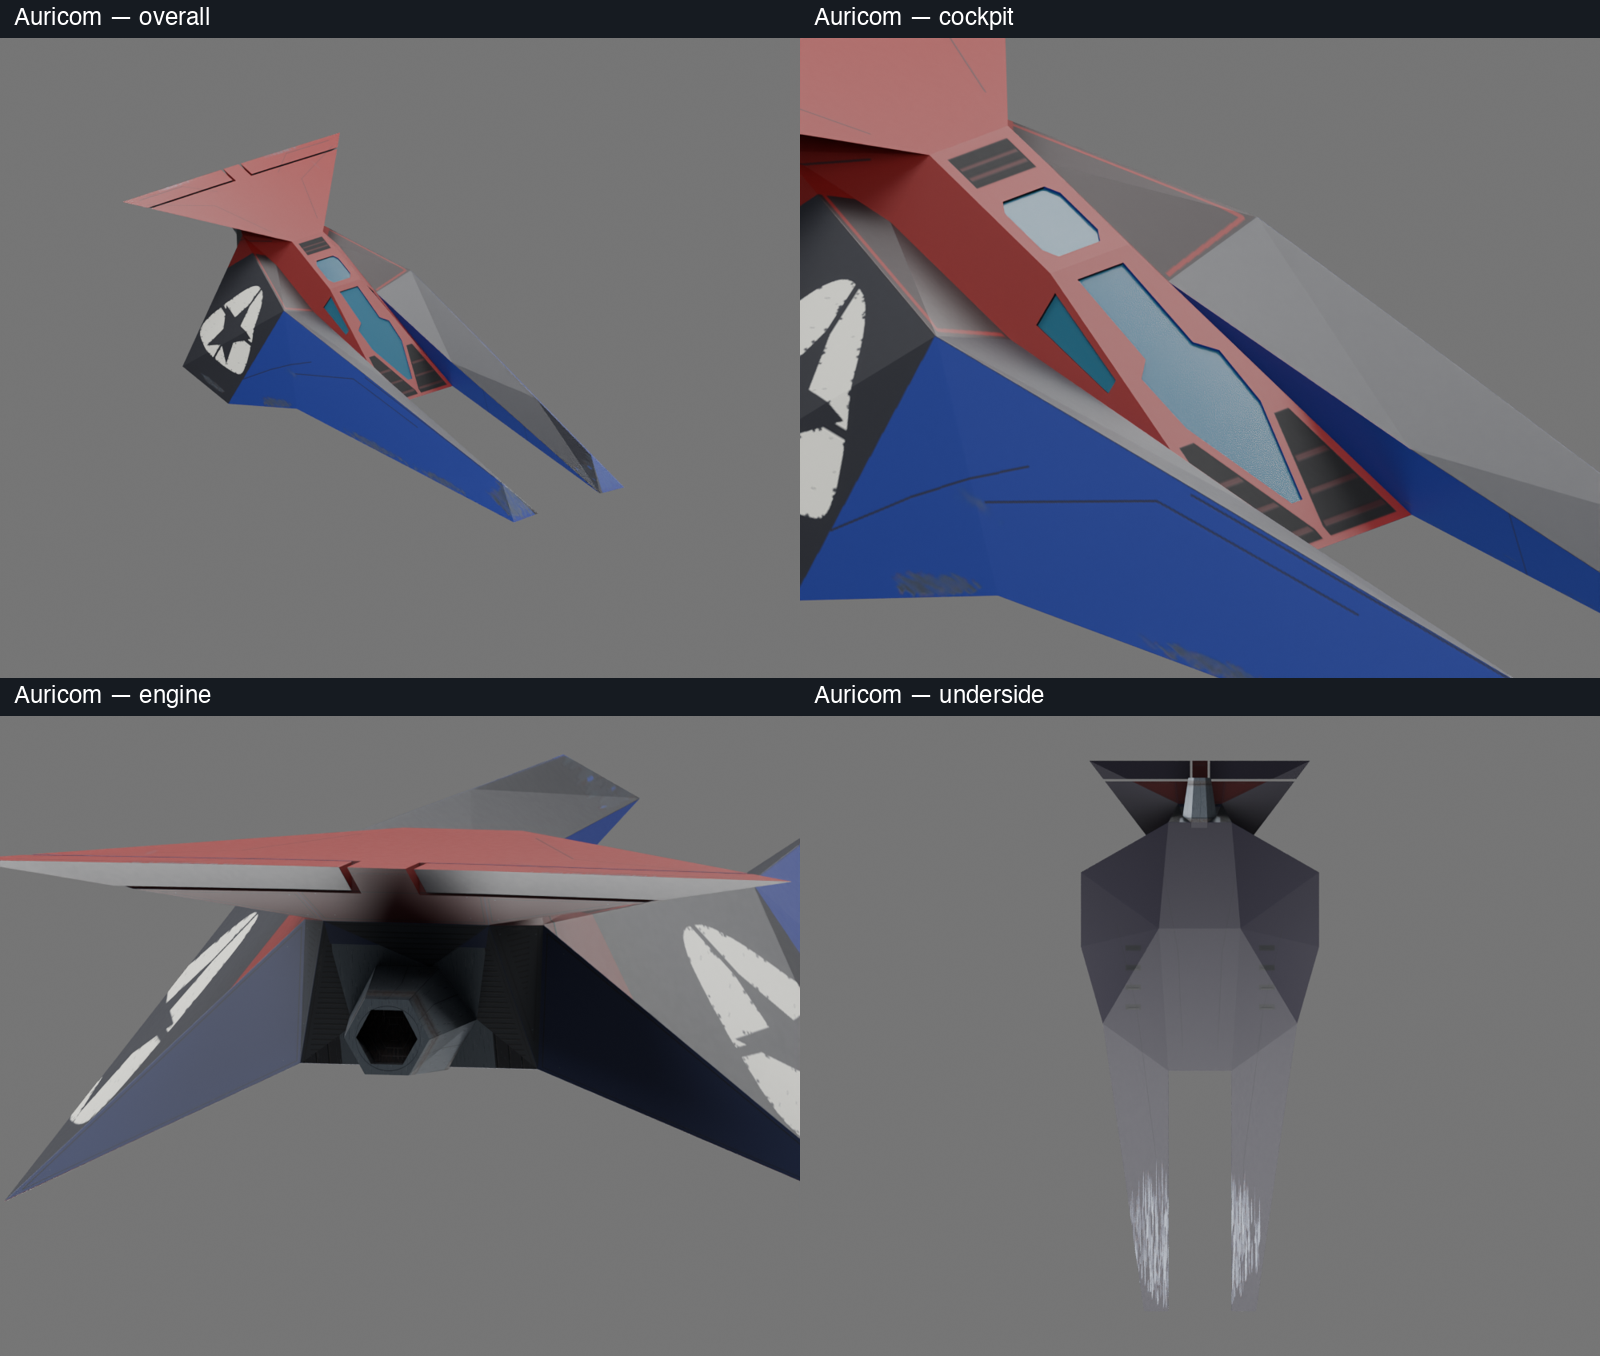
Auricom uses red, blue and dark panels, with the front vents following the windshield contour at a consistent margin. Its star artwork needed clean edges, and the engine texture coverage needed checking from the rear as well as the front.
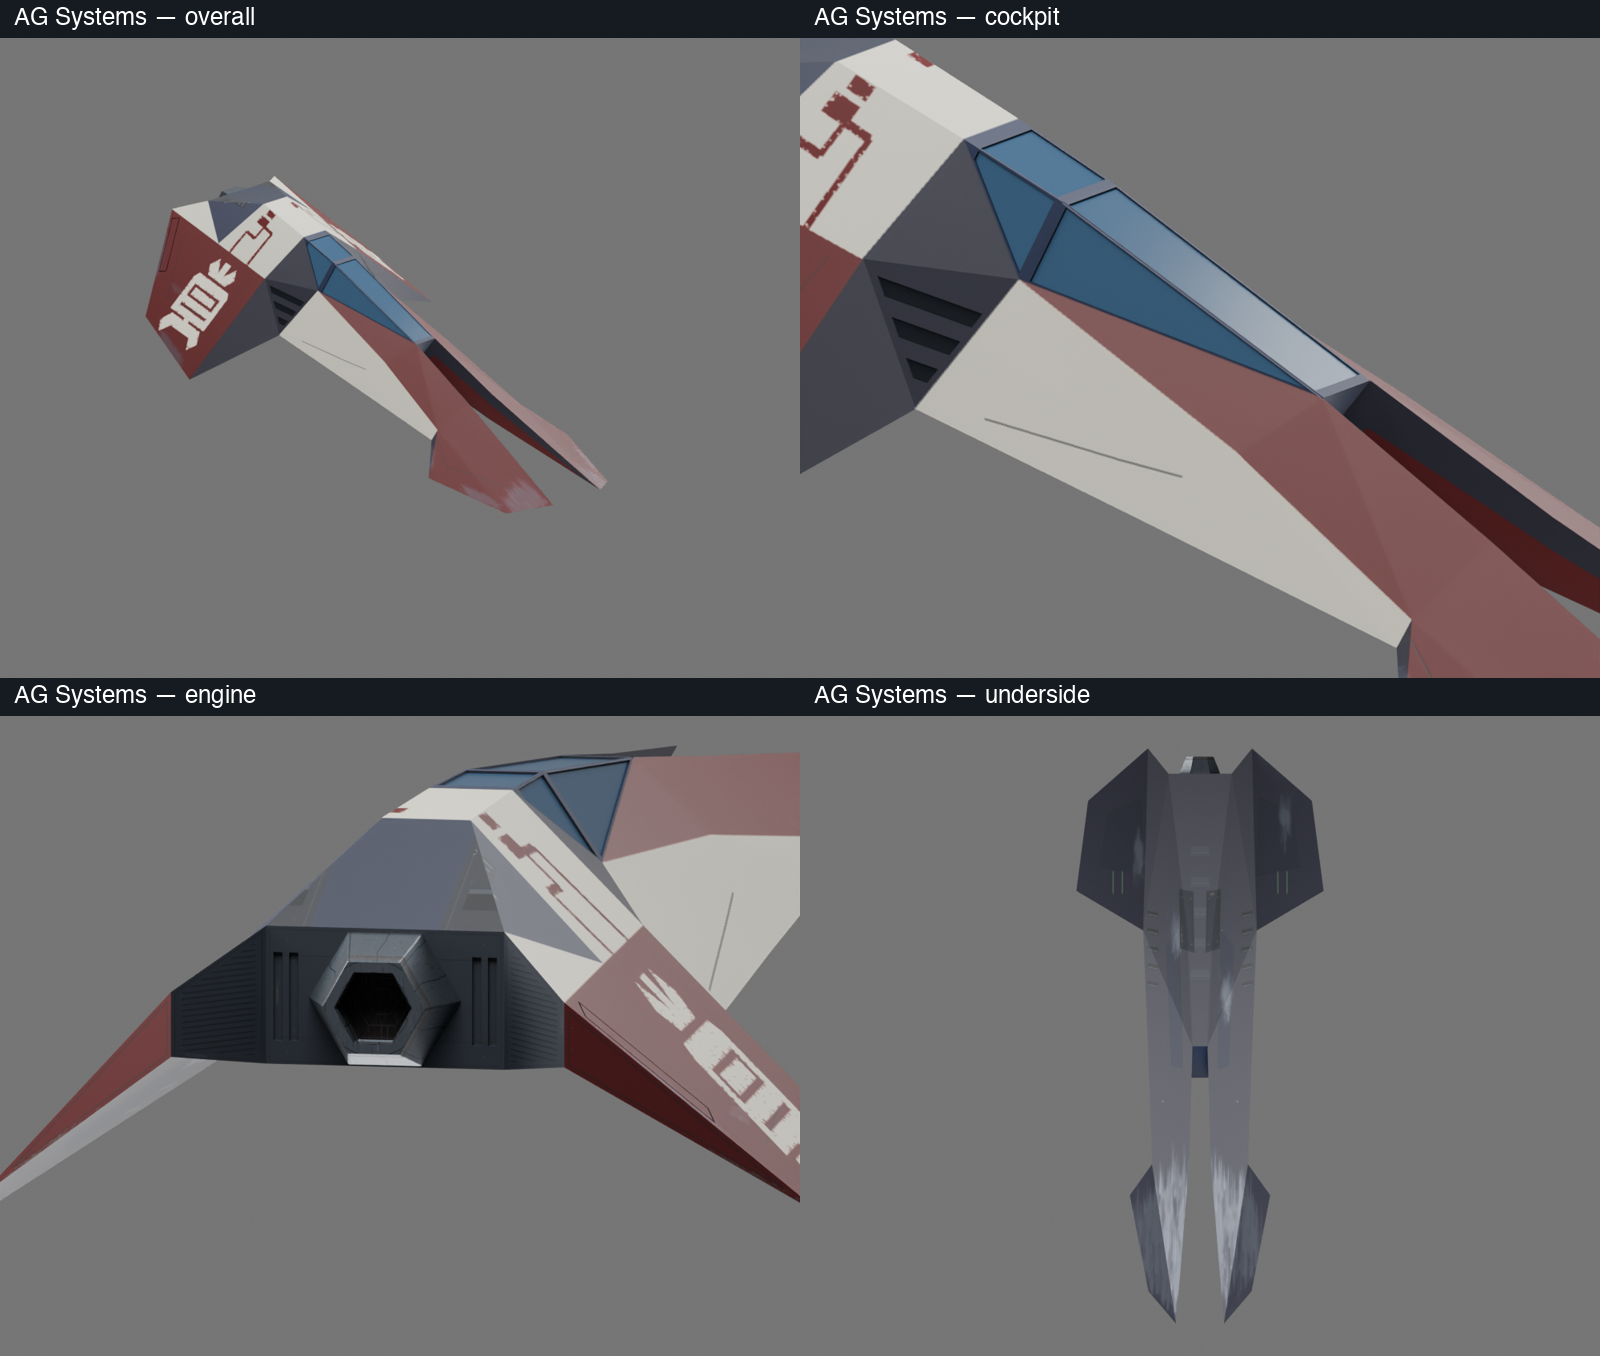
AG Systems keeps the red-and-white divisions and lettering clear. The vents beside the cockpit follow the panels they sit on, and the rear control surfaces have a thin profile to suit the wings. Wear is concentrated on the exposed areas rather than obscuring the main graphics.
Piranha has warm red wings and a continuous orange canopy section. The crown-like rear motif and long diamond cutouts were reconstructed with clean outlines. The paint carries around the glazing and across adjoining faces, while the engine and rear-wing finish follows the individual components.
Paint, stickers and wear
I wanted the wear to have a reason for being where it was. Leading edges get directional scuffs, selected seams get blended abrasion, and the engine housings and service areas carry more grime. Large areas of paint remain intact.
The two sides have independent wear placement. Separate masks handle paint abrasion, damaged stickers, engine grime and exposed metal. A chip in a vinyl graphic reveals paint; a deeper hull scratch reveals alloy. The recovery drone also has some oxidation on its older trackside surfaces.
Base color carries the paint and markings. Roughness controls the reflections, metallic values pick out exposed alloy, and normal maps provide shallow seams, rivets and fasteners. The underside and machinery are rougher than the painted upper surfaces. Ship texture masters stay at 4K, with runtime tiers prepared separately.
Lettering uses the appropriate game font where available, including XL/2097 lettering on the drone. Logos and cutouts have their own tracing and spacing checks; wear can't fix an incorrect outline.
Weapons and trackside models
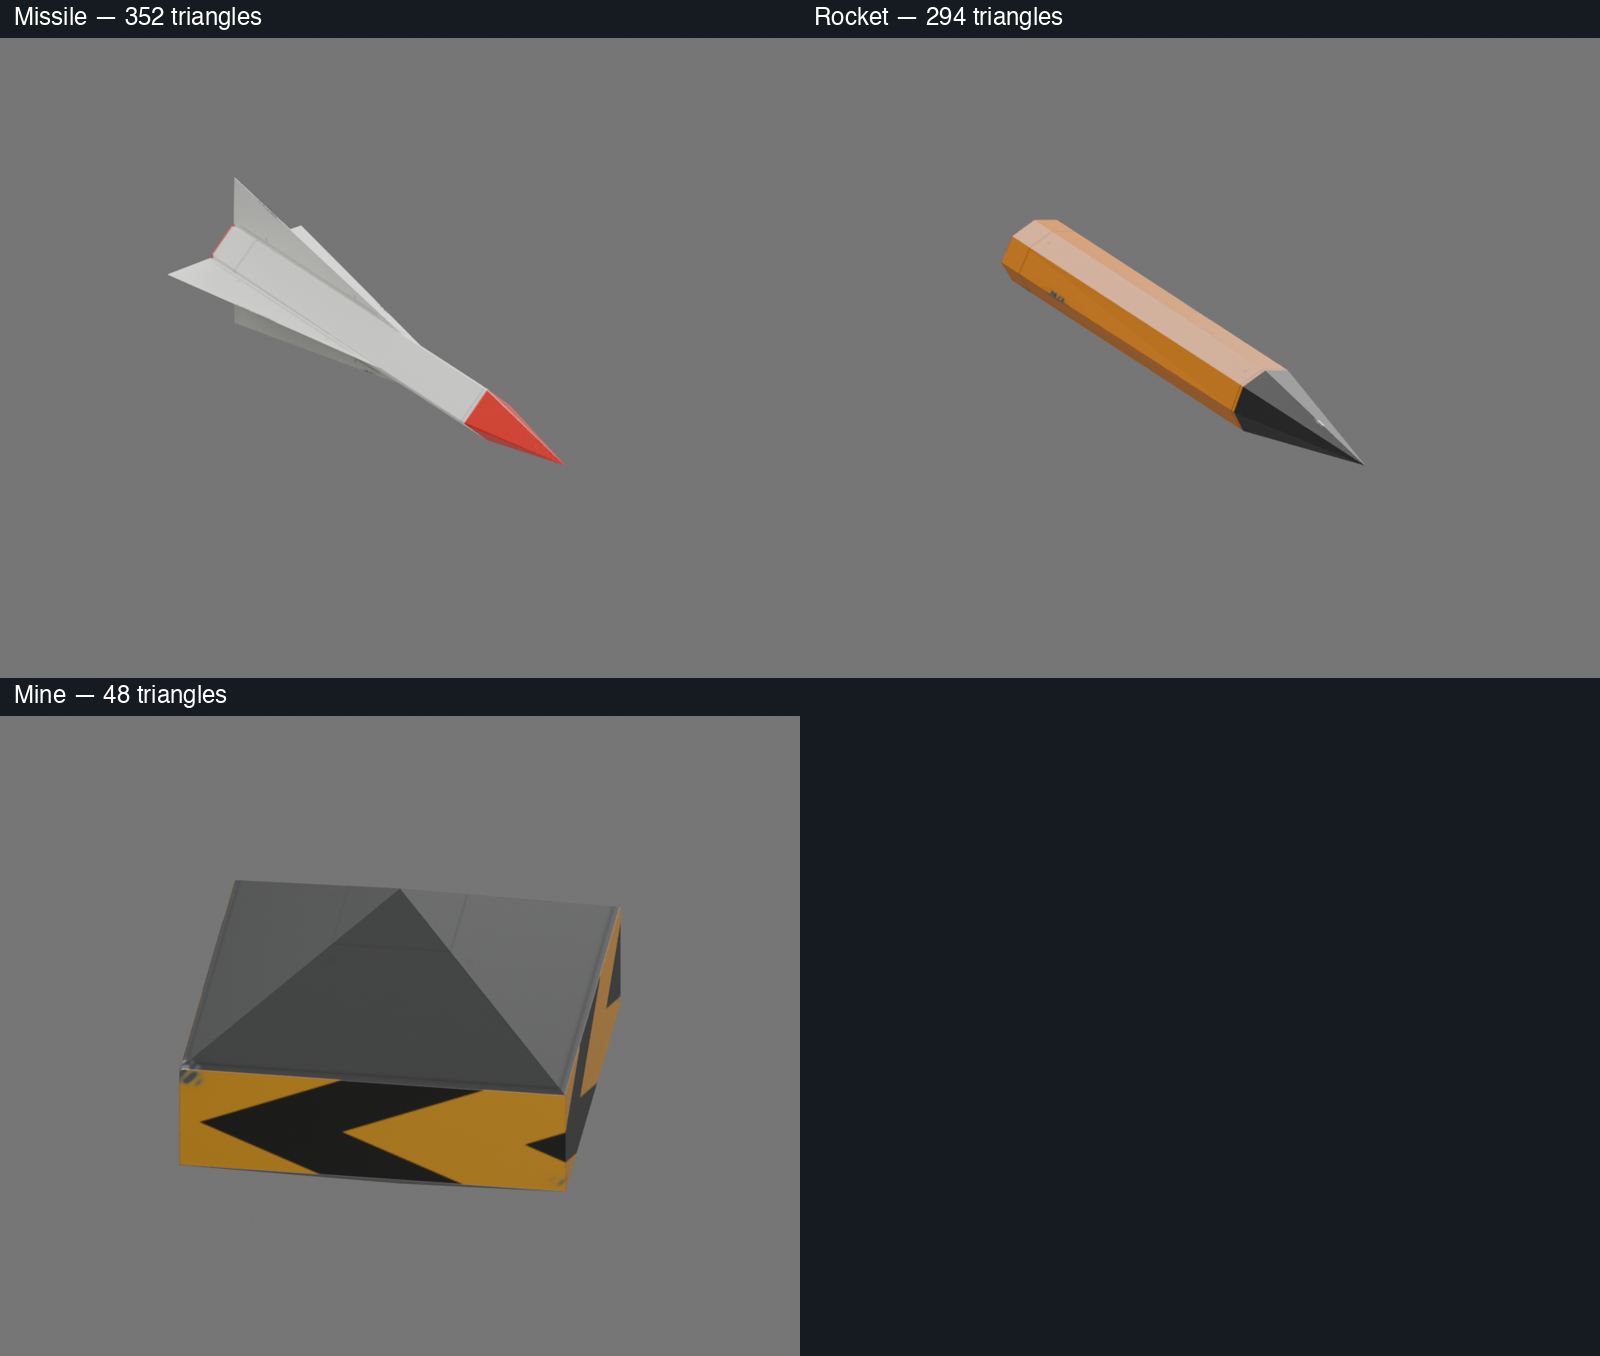
The weapons have small geometry budgets. The missile is 352 triangles, the rocket 294, and the mine 48. Their shape and colors come from XL, with Pulse used as a secondary reference for mechanical detail. Most of the extra detail comes from the materials, reserving geometry for the outline.
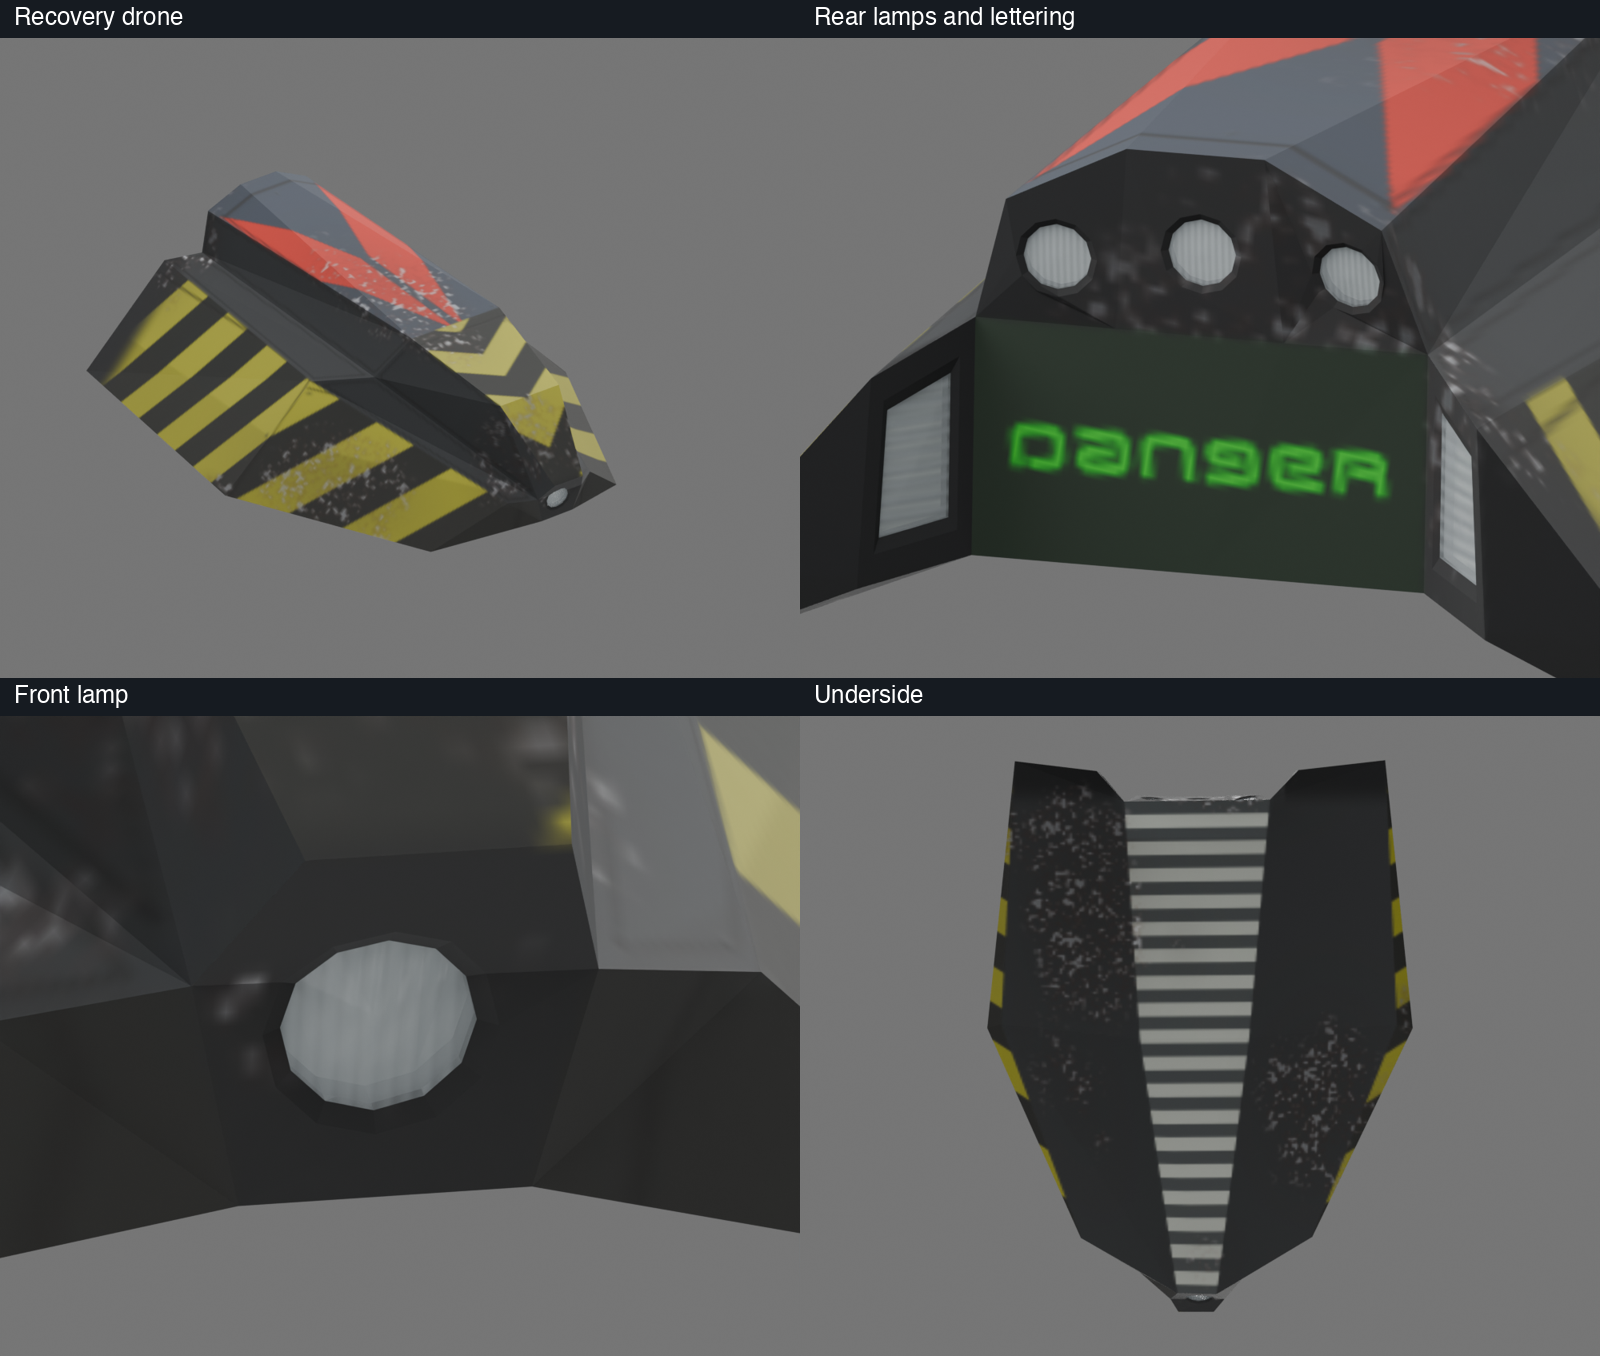
The recovery drone has 638 triangles, with worn grey panels, rivets, continuous hazard stripes and a centered warning label at the rear. Its front and rear lamps are modeled, with glass and striped surfaces giving the lights some depth.
The starting-light assembly is 308 triangles. The frame has edge wear and grime, and the recessed glass carries a fine line pattern. Running the sequence in the harness makes it possible to check the lamps and their housing together.
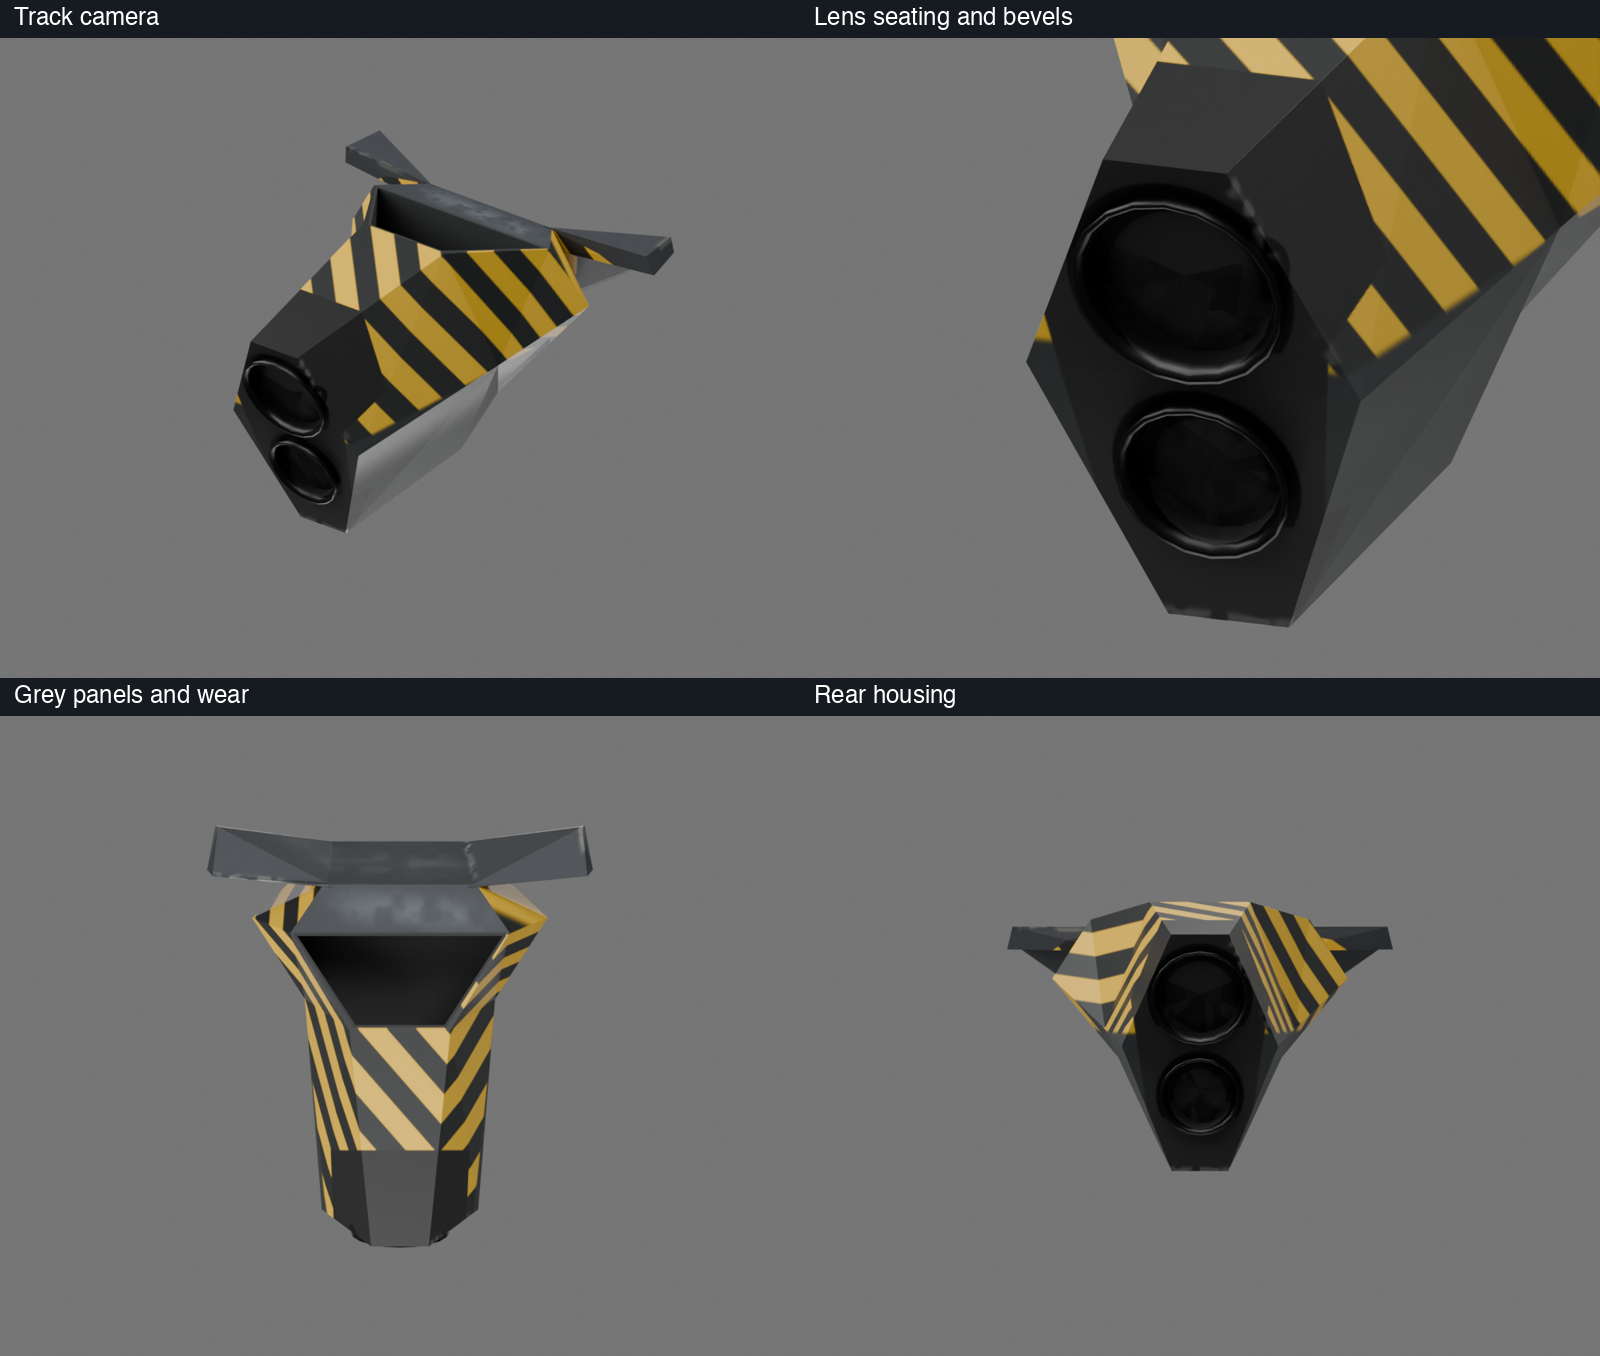
Track cameras use the same grey panels and yellow-and-black stripes, with recessed optics. The flared lens surrounds and inner bevels needed another adjustment so they met the recesses properly. The replacements were then checked across all six XL tracks that contain them, retaining the original placement and animation.
Checking the moving parts
Once the GLB is in NullG, the model viewers and MCP harnesses provide camera presets, material views and controlled poses. Applying steering and each airbrake moves the control surfaces. Close-ups around hinges and pockets show whether there's enough clearance.
The exhaust needs checking in the same way. An engine opening can look correct on its own while the plume starts in the wrong place, or a moving surface crosses it. The harness checks the flare and trail attachment locations against the model.
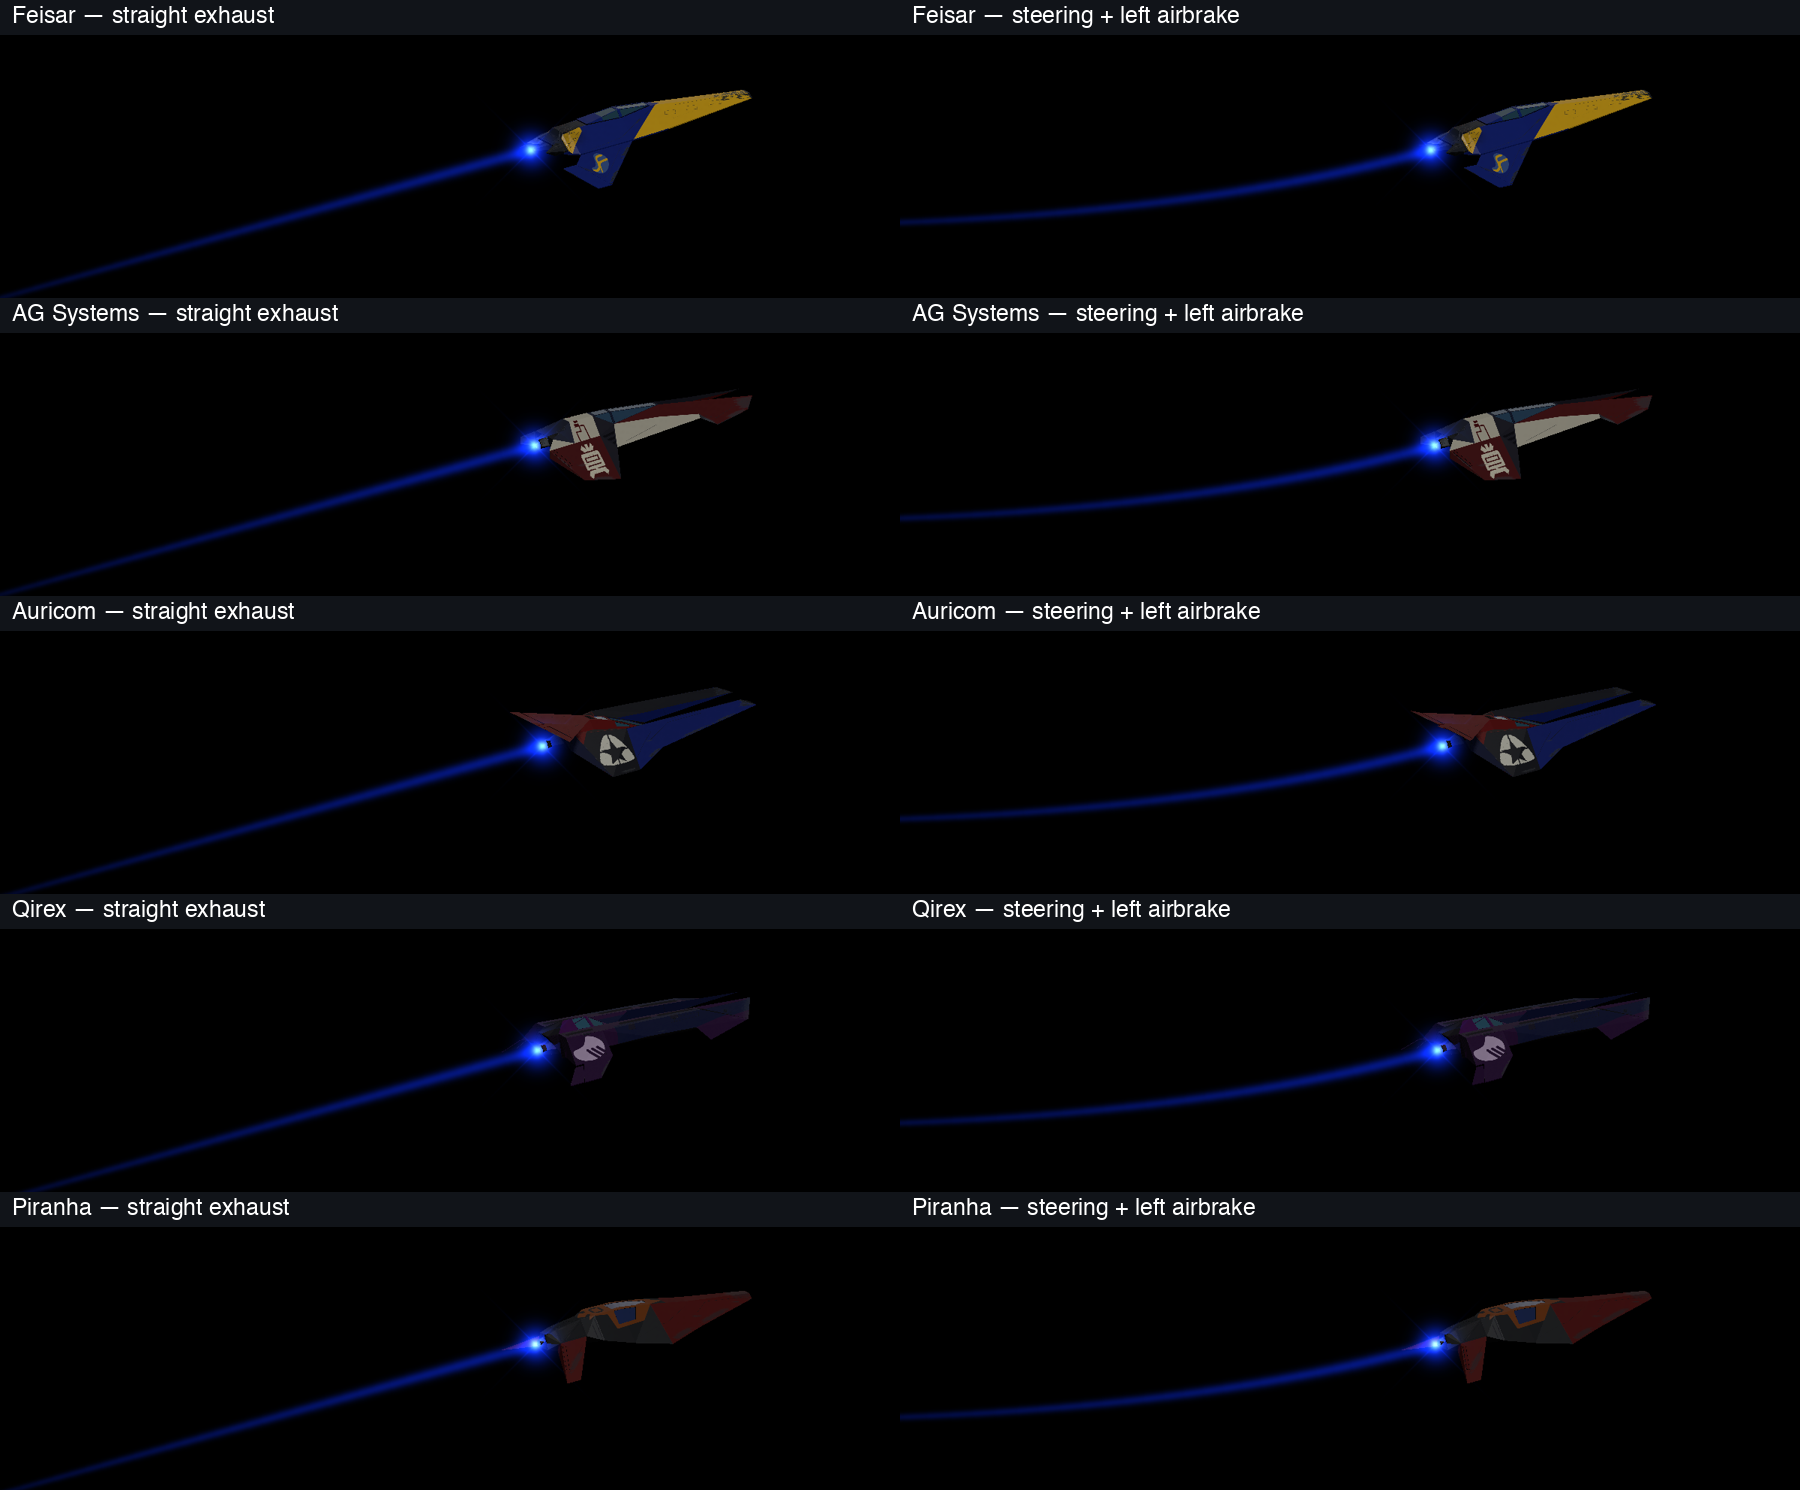
Straight exhaust trails on the left; curved trails with steering and left airbrake applied on the right.
The shield adds another check on scale and transparency. Its envelope is authored in Blender, while the runtime shader supplies the flowing plasma. This view shows both around Feisar, with the ship still visible through the effect.
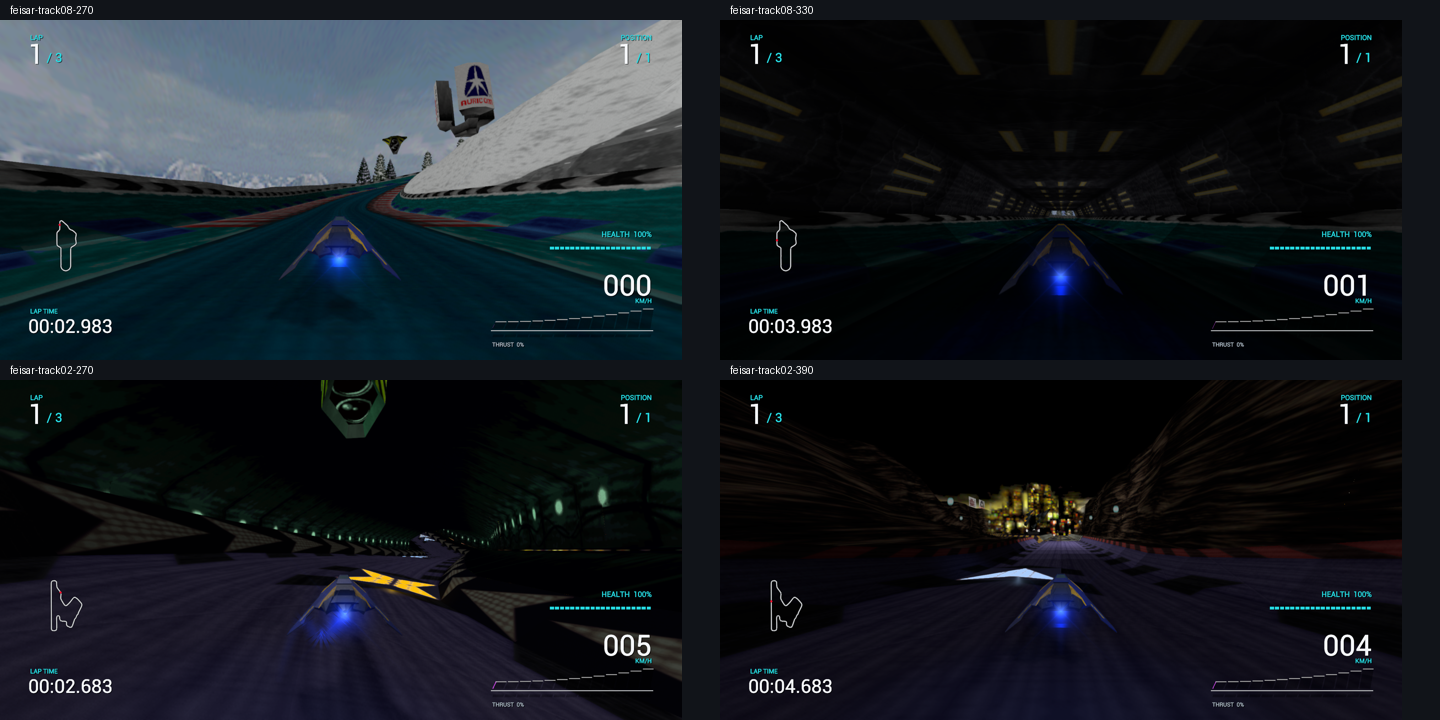
The final checks are in the menus and on track. Bright sections, tunnels and shadows each reveal different problems with paint, metal, glass and normal-map detail. Scale and attachment checks keep the replacement models connected to the existing racing behavior. The architecture overview describes the rendering and simulation systems behind those scenes.
The Blender files and game exports are saved for all five ships and the smaller objects. Being able to ask for a narrower window frame, a better-fitting lens or a thinner moving part, then compare the same view again, has made those small corrections much easier to review.